 Recipe Hook - Mustad Streamer Hook sz. 2 or 4 2XH 3XL Bead - Glass 6/0 white Thread - White 6/0 or clear mono Tail - White marabou with two strands pearl krystal flash on each side Rib - clear mono Dubbing Loop - * create dubbing loop and hang out of the way until rubber legs are tied in Silicone/Rubber Legs - White barred * two legs (one on each side) at both the 2/3 and 1/3 point on the hook shank Dubbing Loop - Body - * fill dubbing loop with white dubbing of choice, spin, brush out, and wrap forward just passed the front set of rubber legs Saddle Hackle - White hackle tied in near the base wrapping backwards to rear of fly * when you reach the rear, counter wrap and trap the feather with the mono rib wrapping the rib to just past the front rubber legs * brush out the dubbing and blend it with the saddle hackle Hot Spot - form a small dubbing loop and fill with a small amount of red dubbing (enough for 1-1.5 turns) *spin, brush out and wrap forward Head - Natural grizzly soft hackle Optional** - two coats of nail polish on glass bead and thread head (one coat clear pearl glitter, one sally hansens) Tying Notes Make sure that you don't forget the rib when tying this fly or you wont be able to attach your saddle hackle later. This is a woolly bugger with a dubbing body rather than a chenille body. Keep tension on your saddle hackle when wrapping backwards and wrap the rib tightly forward. This counter wrap has never failed me and I have never had a bugger fall apart. Make sure to use a fine tooth dubbing brush rather than a bodkin to brush out dubbing. The bodkin could damage the saddle hackle or rib you have already tied down. You can add lead weight if you want this fly to get deeper. Use this tying recipe to follow along with the tying demo below. Instructional DemoSpeed DemoFishing Tips Strip it in, swing it, dead drift it, or jig it. It all works! Woolly buggers are extremely versatile! This particular fly is a great minnow imitation and shines in small creeks and streams. Vary your retrieve speed and presentation based upon how the fish are responding. Check out the video below to see how this fly saved the day and produced a nice creek bass and northern pike!  In the video below, I float a small creek fly fishing for smallmouth bass. In part one I floated the upper section and in this part I floated the lower section. If you haven't watched part one you can see it here. Links to the Popper and Big Bird Bugger Tying recipes will be below. The tying recipe for the Drop Shot fly will be below the video. If you haven't already, subscribe to my blog and my YouTube channel for more videos and fly tying recipes. Thanks for watching and tight lines! Feather Popper Tying Recipe Big Bird Bugger Tying Recipe
Recipe - Olive
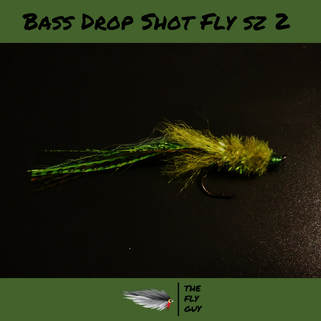
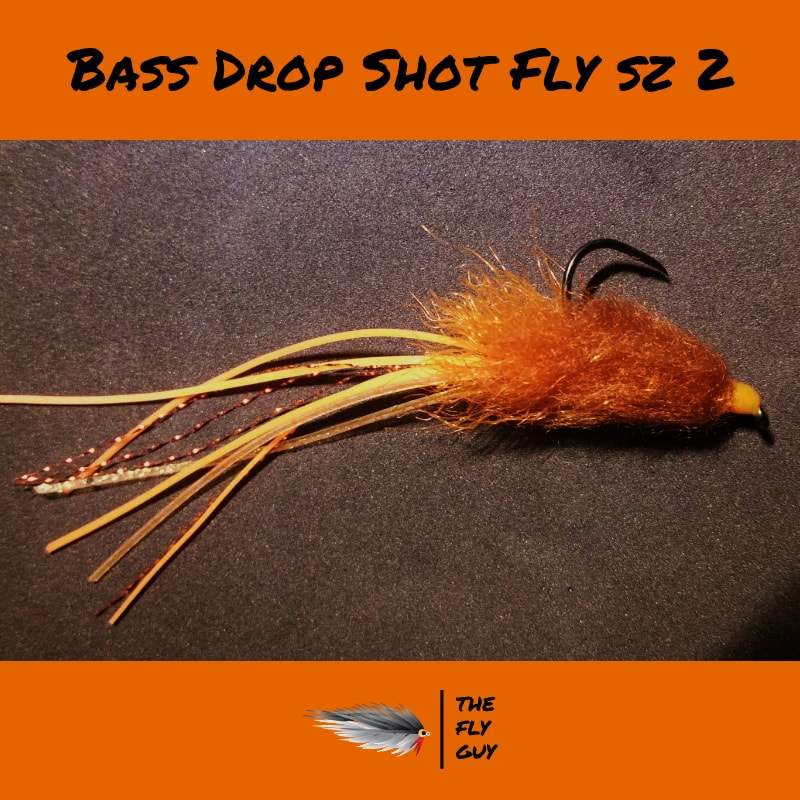
Hook - Eagle Claw L2BU-2 Octopus All Purpose sz 2 Thread - olive 120 Denier or clear mono Tail - olive krinkle Hair, 3 chartreuse barred rubber legs, 6 strands olive polar or krystal flash, 3 olive barred rubber legs, olive krinkle hair *the krinkle hair provides a foul guard while still enabling the rubber legs to move freely. you can also use buck tail or fish hair as well. Body - olive cactus chenille Head - coat with olive or chartreuse finger nail polish and top coat with Sally Hansens Hard as Nails Tying Notes This fly is super easy to tie and it catches fish! You can tie a lot quickly and vary colors to match bass foods in your local waters. The rubber legs are the key to this pattern as they provide a ton of action even when the fly is not being moved. The legs should be about three times the length of the hook. Do not skimp on the krinkle fiber as it will keep the rubber legs from fouling. Just remember to trim and taper the fibers as needed. I will be posting a video soon on how to rig and fish this simple but effective fly for bass! Recipe Hook - 3XL, 2XH streamer hook-sz. 2 or 4 Thread - yellow 210 denier or clear mono Dumbbell Eyes - 11/64 brass eyes in gold (sz.4) 3/16 (sz.2) *eyes are optional - I add fabric paint eyes directly to the brass eyes before completing the fly. If you would like to learn how to do that, click the button below. If you are new to fly tying and would like to learn how to attach dumbbell eyes to your flies, click here to see a tutorial. Tail - yellow marabou topped with yellow barred grizzly marabou Flash - yellow and gold krystal flash - 2 strands of each on each side of the marabou Body - 2 yellow saddles and yellow sparkle scrub *twist all three materials together with a binder clip and wrap forward to just behind dumbbell eyes. Legs - 2 yellow rubber or silicone legs tied on each side of the body directly behind dumbbell eyes Head - 2 yellow, grizzly soft hackles wrapped together behind eyes (2-4 wraps) *advance thread to in front of dumbbell eyes and tie in two clumps of yellow dubbing on top and bottom - wrap thread back over dubbing and comb backward to achieve desired head shape and brush dubbing out Finish - yellow nail polish top coated with Sally Hansen Hard as Nails Tying Notes This fly is just a beefy woolly bugger with dumbbell eyes. The tricky part is tying the middle body section and twisting materials together with the binder clip. It is not hard to do with a little practice it just takes some getting used to. This fly has awesome action under water and it is in part to the shape of the head. try to get your head shape as close to the picture as possible. This will make your fly dart from side to side when retrieved quickly. Fishing Tips This fly shines during the hot days of summer in smallmouth bass streams. This fly can be retrieved quickly or jigged slowly because of the dumbbell eyes. Experiment with your retrieve to find out what the fish will take on any given day. This fly has been known to motivate larger fish to eat during hot weather. In shallow water, use a floating line with a longer leader close to nine feet. in deeper water, shorten the leader and use an intermediate sink or full sink fly line to reach fish. if you couple this fly with a short leader and a sink tip you can also jig this fly in and around structure. The Big Bird Bugger is very versatile! Get out there and give it a try! You will not be disappointed! Check out the video below to see this fly in action! 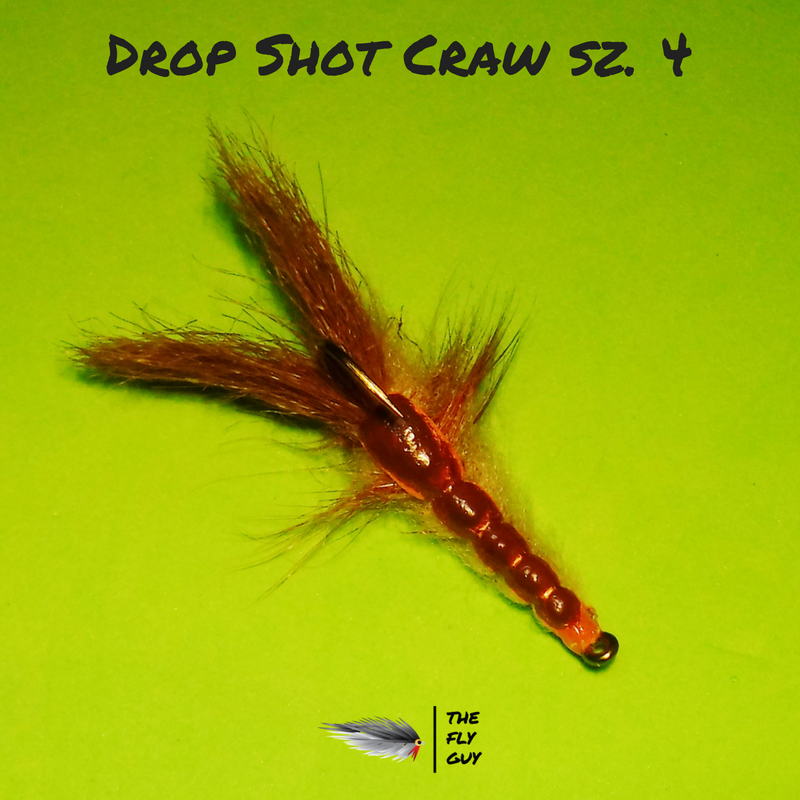 Recipe *pattern is tied upside down and weightless to be fished on a drop shot system Hook - 3XL, 2XH streamer hook-sz. 2 or 4 Thread - brown 120 denier or clear mono Claws - brown craft fur tied pointing at out at an angle on each side of the hook bend Shell - thin orange craft foam - tied in pointing towards claws - this foam can be found at dollar tree Legs - brown saddle hackle *wrap forward after Upper body dubbing has been applied - wrap to just in front of the hook point Upper Body - tan dubbing blend - dubbing loop wrapped in front of hook point - *now wrap hackle forward Rib - clear mono or wire tied in in front of hook point Lower Body - tan dubbing blend in dubbing loop wrapped to hook eye *pull shell foam slightly until it stretches a little, center on top of fly, and tie off at hook eye *take rib and wrap forward over foam shell to create roughly 5 segments Finish - coat thread wraps near eye with orange nail polish to create a hot spot - after dry, top coat with Sally Hansen Hard as Nails - coat foam with bronze fabric paint - when dry top coat with brown fabric paint to highlight segments Tying Notes These flies can be quick to tie once you get the sequence down. Make sure you tie this pattern upside down so it can be fished hook point up on a drop shot system. After tying everything in, before you apply any finish, use a dubbing brush to tease out the body fibers and make it buggy. The fabric paint makes this fly very durable and your time at the vise will be maximized. They will hold up fish after fish. Make sure to experiment with colors to match the hatch in your local waters. Fishing Tips This fly can be fished under an indicator while drop shot nymphing, cast with a drop shot rig and darted near the bottom, or slowly jigged. Depending on the depth and type of water will determine if you use a floating, sink tip, intermediate sink, or full sink fly line. This fly is at home in creeks, streams, and rivers but would do well in still water where crayfish are present. Check out the video below to see this fly in action!  Recipe *The foam popping head should be completed first. See tying notes for tips on construction. Hook - 3XL, 2XH streamer hook-sz. 4 Thread - black 120 denier or clear mono Popping Head - craft foam tied in at head one piece behind the other until the front 1/3 of the hook is foam. (4-5 foam pieces) cement each piece together with super glue and shape as desired. *coat foam head with nail polish or fabric paint for extra durability Tails - tie in a short tag of black krinkle fiber, fish hair, or buck tail to serve as a foul guard followed by 4 black saddle hackle tips tied about 1.5 times the length of the hook. (keep those feathers you cut off to use for the body!!!) Last, tie in six stands of purple/black polar flash or krystal flash on each side of the tail. Rib - clear mono or fine silver wire *wait to wrap forward until final steps! Body - with the feathers from the tail you cut off previously, line up three feathers by the cut tips and tie in but leave them to wrap forward after you have tied in the rubber legs and advanced your thread to the foam head. Rubber Legs - tie in two black rubber or silicone legs on each side of the fly just behind the foam head. *trim the leg length to just inside the back of the hook to prevent fouling Final Steps - wrap the three hackles forward and tie off behind the foam head. wrap the rib through the feathers to increase durability and tie off behind the foam head. coat the small thread head with head cement or super glue and you are good to go! Tying Notes This foam popper is fun to make and the color combinations and options are endless. Make sure to follow the steps in order to make the tying process as simple as possible. Tying the foam heads first enables you to have them prepared and ready to tie in batches and when the flies are finished they are immediately able to be fished. Don't skip the rib as it will extend the life of your fly dramatically! The shape of the foam head can be square, round, flat, or cupped. I prefer a small flat head as it pushes a lot of water. By cutting a strip of foam and rounding the front you can easily tie a popper head from one piece rather than cutting out individual pieces. Each time you tie the front of the strip to the fly and cut off, you round the top of the strip and repeat until the head is finished. Then you can shape and coat the foam head as desired. Tying the foam head this way enables you to tie smaller poppers that displace a lot of water for their size and you do not lose hook gap. The foam head is all on top of the hook. 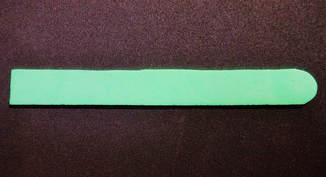 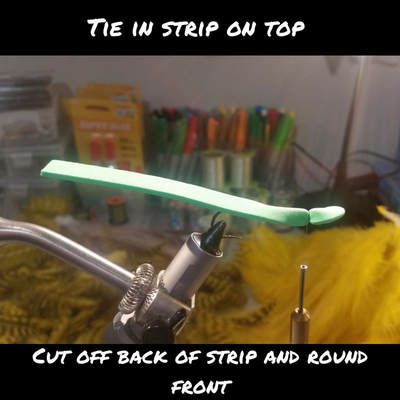 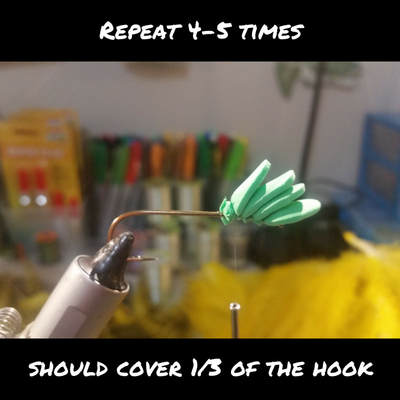 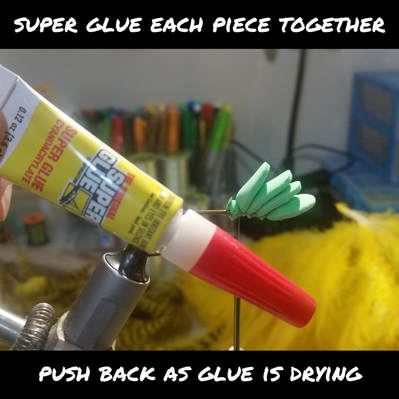 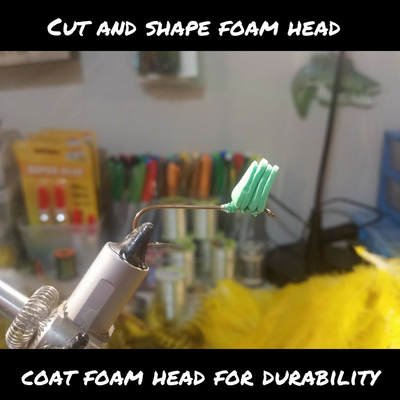 Fishing Tips These poppers catch fish. Based on the day and conditions, experiment with your retrieve to see what the fish are wanting. Sometimes fish will want a steady pop, a pop and sit, or sometimes they want it walked across the water. I have had big bass come up and sip this popper like a trout taking a dry. Always let your popper sit on the surface, after casting, until the rings dissipate. Sometimes fish will be looking at it and hit before you make your first pop. If you pop it too early, you could potentially miss a fish. There is no need for a long leader with this fly. A short, stout leader of six feet with twelve pound mono tippet will do the job. Check out the video below where this popper takes a nice Spring largemouth bass! I reached 100 subscribers on YouTube and I am doing another giveaway! The video is below and will explain how to become eligible. The giveaway runs today 7-27-18 through Monday 7-30-18. The winner will be chosen Tuesday 7-31-18. A big thank you to all my subscribers for your support! 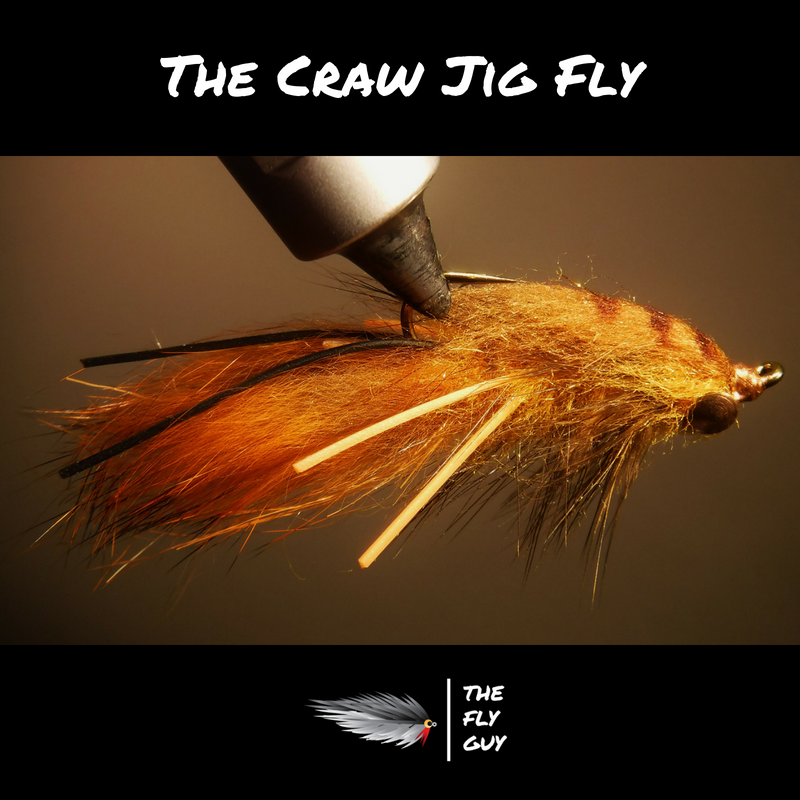 Recipe *Fly is tied upside down to create a snag resistant pattern that has a jigging action Hook - 3XL, 2XH streamer hook-sz. 2 or 4 Thread - clear mono or 210 denier brown or orange Dumbbell Eyes - 3/16 brass or lead Lead Wire - 6-8 wraps 0.025 lead wire Claws - crawfish orange zonker strips each 1/2 length of body - top with 2 black rubber or silicone legs Rib - clear mono or copper wire Dubbing Loop - Crawfish orange dubbing blend Rubber legs - 2 orange rubber or silicone legs on each side of fly tied in at the end of the hook point Hackle - one brown saddle feather *Follow this tying progression so that your fly turns out correctly
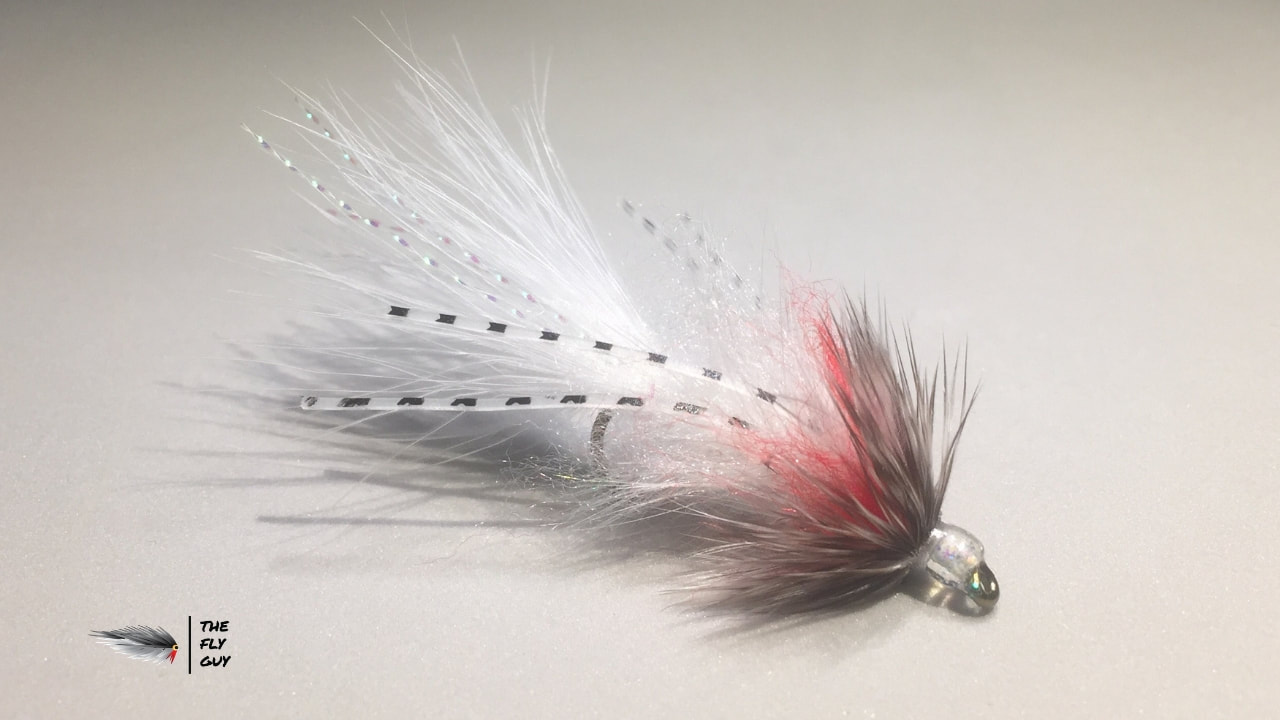
Dubbing - Get a generous clump of brown dubbing and tie in between the dumbbell eyes and the hook eye covering the top of the fly - make sure it extends to the hook point and you can detail it with a sharpie Head - coat with either brown fabric paint or brown or orange nail polish Tying Notes Once you get the steps down for this fly it can be a quick tie. Make sure to follow the order closely. I prefer a mono rib over wire because it bites into the materials and provides better durability. If you use thin wire, know that it may slip over time and is more easily damaged by fish. The upturned eye on this fly produces a nice jigging action especially when coupled with a sink tip line. When coating the head, use fabric paint if you do not need the flies right away and can wait a couple days for the full dry time. If you need them quickly coat the head with orange or brown nail polish and the head will be fully cured in around twenty minutes. Multiple coats of finger nail polish is best. Fishing Tips The fly is best fished on a stout, short leader of at least ten pound test tippet. Depending on water depth I would either use a short sink tip of 5- 10 feet or a full sink fly line for deeper water. This fly can be retrieved many different ways. During the spring a slow hop will take lethargic smallmouth bass but during the heat of summer, a quick darting retrieve will produce aggressive strikes. Experiment and see what retrieve takes fish in your home waters. Crayfish are preyed upon by many fish species and if you fish this regularly you may connect with bass, catfish, carp, freshwater drum, northern pike, and even trout. Give this fly a try! Check out the video below to see this fly in action! 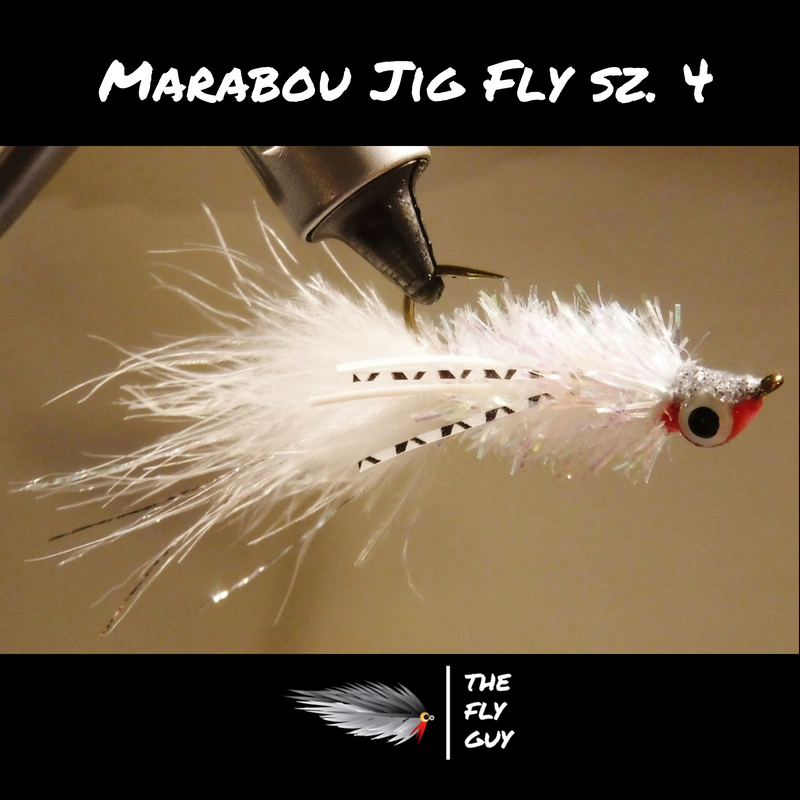 Recipe Hook - 3XL, 2XH streamer hook-sz. 2 or 4 Thread - Clear mono or 210 denier white Dumbbell Eyes - silver, brass 11/64 tied as far forward as possible Lead wire - 0.015 4-6 wraps directly behind brass eyes Tail - white marabou, pearl/silver polar flash Body - medium pearl estaz and white + white barred rubber or silicone legs 1.) white - 2 on each side 2.) White barred - 2 on each side Head - Fabric paint coats in order: 1.) solid silver on top 2.) red on bottom 3.) silver glitter top coat over solid silver 4.) pearl flitter top coat over red *allow adequate dry time before applying top coats 5.) add fabric paint eyes *If you would like to learn how to make fabric paint eyes on dumbbell eyes click the button below. Tying Notes These are easy to tie and catch a variety of fish! Less time at the vice equals more time on the water! The fabric paint adds durability and permanent color to your fly. Make sure that the rubber legs are clipped shorter so they are not fouling when you are on the water. Allow the fabric paint to fully dry before fishing! If you want to learn how to attach dumbbell eyes to your flies, click the button below. Fishing Tips
This fly is easy to fish because you can do a lot of different things with it. Swing it, strip it, hop, twitch, and jig it! It is meant to be fished like a jig and the marabou is the key player here. When you jig this fly, the nose points straight down allowing the tail to stick up facing any potential fish. The marabou moves while the fly sits still which is why this fly is so deadly. The brass eyes also keep the hook point riding up in the water preventing snags as much as possible. Get out and target bass with this fly and I know you will catch fish! |
AuthorMatt Campbell Archives
February 2020
The Fly Guy (tfgflies.com) is a participant in the Amazon Services LLC Associates Program, an affiliate advertising program designed to provide a means for sites to earn advertising fees by advertising and linking to amazon.com.
|
|
|
|
 RSS Feed